US Naval Academy Commencement Week

Commencement Week for the US Naval Academy in Annapolis Maryland is a major event for both the Graduates and Midshipman at the Academy, and also for the city of Annapolis. Besides the influx of families and friends of the staff, instructors and the Midshipman, it attracts tourists from all over the United States and the rest of the world. Probably the biggest draw and most anticipated event is the flight demonstration performed by the Navy's Blue Angels precision flying squadron.

Some History
At the end of World War II, the Chief of Naval Operations, Chester W. Nimitz, ordered the formation of a flight demonstration team to keep the public interested in Naval Aviation. The Blue Angels performed their first flight demonstration less than a year later in June 1946 at their home base, Naval Air Station (NAS) Jacksonville, Florida. LCDR Roy "Butch" Voris led the team, flying the Grumman F6F Hellcat.

Adding Some Ventilation Inside The Boat

If there is any one thing that people object to on a boat the most, it is unwanted smells. And as a boat gets older, it develops smells from all kinds of sources. There are volumes of information out there on holding tank and head odors so we did not plan to address them with this minor modification. After almost 20 years of living aboard, we have found that certain areas of the boat can develop odors from trapped moisture and condensation in any climate and any season. A bigger problem that can surface is mold and mildew, which can generate odors and also cause health problems in some individuals. We learned all of these lessons the hard way, and the solutions were actually quite simple.

The secret to keeping a boat odor and mold and mildew free is ventilation, ventilation and, of course, ventilation. Fans, air-conditioning and heating systems all help in the ventilation department. Other things like leaving hatches or ports open, even a crack, make a big difference, and fans and solar vents make huge improvements. But none of this will help much if there are compartments all over the boat that have no way to exchange air, and allow air to flow in and out. These enclosed compartments are further insulated by cushions and mattresses, not to mention latches that keep the access closed tight. Almost all boat builders want the interior surfaces to look as smooth and unbroken as possible, but once again, this contributes to the problem.

In our current boat, and the previous one that we cruised and lived aboard for 17 years, we took some time to open up all of the interior space to air circulation. Using a hole saw, we drilled ventilation holes inside the cabinets and lockers so the air can flow from one end of the boat to another. We use 12 volt computer fans strategically placed to assist the circulation process, since they are extremely quiet, use very little power and will run continuously for long periods of time. We also use a dehumidifier that runs all year long when we are plugged into the dockside power. It is incredible how much moisture it pulls out of the air, no matter what season and no matter whether we are running the air-conditioner or the heater.

The weekend was set aside to work on the circulation issues and make some improvements. The forward v-berth was a particularly problematic area. It seemed to always be damp, and since the anchor locker was forward of it and the shower just aft of it, this was a moist environment. The dehumidifier sits in this cabin and blows the treated, dry air up into the main salon from where it sits. But we knew we needed to get the area under the v-berth circulating air and with 5 inch cushions on top, this was only going to be accomplished by cutting vents in the side. The two berths in the aft cabin are the same with the added problem of water tanks under each berth. We store lots of items, including clothing, under these berths so it needs to be dry and odor free.


In the past, we have used a variety of vent grills. Our previous boat had an all teak interior just as this one does. So naturally we use teak grills for that finished look. But aside from the fact that these teak grills are way too expensive, in my opinion, need to be varnished and the slats are easily broken if something heavy inside the locker falls against them. We have had this happen on more than one occasion.We have used stainless steel grills and they work fine, but just don't look right to us. With the areas we wanted to cover done in a dark teak, we were concerned that anything white would stand out too much. So our options were black or brown, and square or round. The brown grills we could find were either too flimsy or designed to have an air-conditioning duct attached, and stuck out too far in the back. We found a nice, sturdy, black, round grill and ordered 6 of them to do the surfaces we wanted to vent.

The installation part was very simple. We used the appropriate size hole saw to drill through in the location we wanted the vent. We measured carefully to be sure it was centered where we wanted it, and took care that there was nothing behind the spot that could be damaged by the hole saw. When a hole saw is used on teak plywood, it is best to start the hole on one side and before it goes all the way through, finish drilling from the other side. This keeps the wood from splintering as the saw passes through the opposite side. Before we attached the grills, we took the time to sand the teak around the area the vent would be placed and put a coat of varnish on the wood. This way, once we start re-varnishing the interior, these areas will be done and we won't have to remove the grills again for a long time.


Storage And Stowage On A Liveaboard Boat

Anyone that has lived aboard or considered living aboard a boat understands the issues with finding enough space to stow all of your life's possessions. The builders and designers of boats are more interested in bragging that their 35 foot boat will sleep 10 and seat 15 for dinner. What they don't provide is space on the boat to store the bedding for 10, nor the dishes and provisions to feed 15 people. In almost every boat there is a great deal of wasted space along side the hull, behind steps and cabinets and many other areas. So we boat owners need to get very creative if we don't want to spend the dollars for a very large boat just to haul all of our stuff. With every boat we have purchased, we spend the first hour sitting in the main salon asking one question. Where will we put everything we need to be comfortable and enjoy cruising. If we can not quickly answer that question, we move on to the next boat.

Beach House presented that problem since she is 34 feet long and we were transitioning from a 40-foot sailboat with more storage than most sailboats in the 50 foot range. As we sat and pondered the question, we realized the fit would indeed be tight. We had looked at several boats after we sold our Mariner 40 Sea Trek and found quickly that the storage on many of these boats hardly covered weekend cruises, let alone full-time cruising, and these were some very well-known popular boats. With Beach House, we had to do some serious research to figure out if we could indeed find the additional space. After several more weeks of looking and reconsidering our options, we finally came to the conclusion that we could make it work. The deal was done and we began the process of moving aboard.


The galley area holds 4 large drawers, 2 cabinets and a large open area under the windshield. The drawers were optimized using plastic dividers and small plastic baskets wherever they would fit. The area under the windshield would hold additional galley implements stored in wicker baskets, and glass and plastic containers that could have their lids secured. We also have large open shelves at the aft end of the main salon that would be utilized as storage for most of our snacks, chips, cereal, etc. again using wicker baskets, large zipper-type plastic bags and air-tight plastic containers. We used a non-skid drawer liner found in rolls at most hardware stores to keep everything from sliding around. Hanging fishnet bags are great for fruits and baked goods, and lots of other things. Hanging cup holders are used to slide wine glasses and stemmed tumblers into, allowing them to hang upside over the shelf in the main salon, freeing up the available cabinet space for vertically stacked plates and stacking cups.

In the heads, we used plastic baskets inside the cabinets to divide items and organize things to get more in the cabinets than if we just piled it in and had to sort through things every time we needed something. Here again, we used hanging net bags for paper items, and they stayed much dryer than being stuffed inside lockers. We used several off-the-shelf items found in both regular hardware stores and marine chandleries. Small teak racks strategically placed will hold all of those shampoos and sundry items we all need. We also found small stainless steel and textaline hanging storage containers at local hardware stores that attached to the bulkheads with large suction cups. Small hammocks strung up along the inside of the hull will store a great deal of all kinds of items. Towel bars and towel racks can be used to store several towels and wash cloths that might normally be stored in a drawer or locker. Cleaning supplies could be stored on the shelf that the head is mounted on, in plastic containers to keep things organized.


And those are the easy things to do. Now it is time to get creative. Our water tanks are under our bunks in the aft cabin and take up most of the area under the bunk. The area not filled by the tank is used to store several power tools that are not used that often because getting in and out from under the bunk is not always that easy. There is almost always space behind most drawers that is not used perhaps because of hull shape. This room to can be used for storage, keeping in mind that the drawer will need to be removed to get to it. Large areas under seats and settees are usually available to store larger items and bins with lids for cloths, linens, paper goods, tool boxes and pretty much whatever will fit. Items such as chartbooks and placemats can be stored under seat cushions and mattresses. It keeps them flat and readily available.

The next step is to look for small modifications that can pay off in a big way. We found that there was space under the bottom step that actually would accept large flat plastic containers like those used to store items under a bed. By removing the step tread and the front of the bottom step, we found the plastic containers could be slid inside the steps and with very little carpentry work. The front and tread could be easily removed and replaced to gain access to this otherwise unusable space. Also, the space between the first and second step was deep and open. We enclosed the area just under the first step with a nice piece of teak with an opening cut in it to allow shoes and other items to be stored where normally there would be nothing. Because we cut this in an oval shape, we used split electrical wire loom that fit over the cut edges to finish it off. Large open areas such as under the forward v-berth can be sectioned off and allow much more to be stored than if it were a big open area.


There a few other tricks we can use to keep the need for storage down to a minimum. Almost every live-aboard we know has a large portable dock box. These can be anywhere from a small second car to an older-model station wagon to a full-size utility van. For years, we used a Chevy Astro van until it just got too tired and was recently replaced. We used our "dock box" to store items we might not need on the boat, but wanted access to on a regular basis. With the sailboat, this meant, among other things, our extra sails, things we might need and use for repairs and projects and some larger tools and tool boxes, are also stored here. We also used the vehicle to store clothes when we didn't need them. Being in a northern climate, we store winter clothes in the summer and summer clothes in the winter. We have found this to be much simpler and the clothes more protected by using "Space Bags" that can be compressed by using the suction end of a vacuum cleaner. Since the vehicle is just at the end of the dock, it comes in handy and also provides a second vehicle when we need it. If you look around your boat, and use your imagination, we bet you too, can come up with some pretty creative ideas to get that extra storage space you never thought you had. If all else fails, local storage facilities will rent you a small room for a reasonable rate to get clutter out of your way while you are dockside.

Remaking The Boat Shower Take 2

DSC04034a

Unfortunately, work has seriously interfered with the boat projects and this winter saw very few of the items on my to-do list get done. One project that we did start before the blizzards set in was to redo the shower in the forward head. We had converted the head into a shower when we first moved on the boat, but it was a temporary fix and we planned on a more permanent finish later. Later began in December after the boat was hauled and we moved ashore. I began taking the old Formica like material off of the walls and planned to replace it with FRP panels that would look better, be completely waterproof and easy to clean. These are the typical panels found inside many shower enclosures.

DSC04235aFirst we had to remove the mirror, towel bars, soap dishes, teak racks, and whatever items were attached to the walls, and remove the sink, which slides out from behind the head and has a diverter in the faucet for the shower hose. The plumbing lines to the sink had to be capped off so we could use the fresh water system until the project was completed. Then the original wall covering could be removed. The old material was actually quite easy to remove with a heat gun and a wide scraper. With a few passes of the heat gun and the scraper behind the panel, as soon as the old adhesive warmed up a bit, the panel pulled loose. It was a bit tedious but the panels came off in large pieces with minimum effort and since the old adhesive that held them up was pretty thin, there was only a little sanding DSC04035aneeded to get the plywood behind it ready for the new panels. Once the old panels were off and the plywood sanded, we used a two part penetrating epoxy to further seal the walls against water intrusion. The under-layer of plywood was in excellent condition and there were no signs of water leaking into it at any point. This was probably because none of the past owners had ever installed a shower on the boat in either head. With the walls now sealed, it was time for the next step.

DSC04245aSince there are no square corners on a boat, simply measuring an area and cutting the panels to fit would not quite work for us. So it was necessary to make templates for the three areas we would be covering with the panels. We needed something that would allow us to work in the small space and still be rigid enough to maintain its shape and size when we transferred the shape to the FRP panels. After a little thought and a walk through the local hardware store, we settled on using underlayment for Laminate Flooring. It is very inexpensive, comes in 48-inch rolls and has just the rigidity needed. By cutting sections just slightly larger than the area for which we needed to make the template, the material was taped to the longest straight run on the wall. Then, the material was marked off with a felt pen and cut to size with a pair of scissors. Once cut to size, the templates were placed back on the walls to be sure the fit was right.
 
DSC04340aNext the templates were transferred over to the panels, placing them in reverse on the back of the panels and marking them with a felt marker. The panels were cut with our Ryobi battery operated circular saw and a saber saw, both with fine blades for cutting plastic. The circular saw made all of the straight cuts and the saber saw did all of the irregular cuts. Once the panel was cut it was held up on the wall and dry fitted. They usually needed a little adjustment depending on how complicated the pattern was. We had also purchased the inside and outside corner moldings for the panels so they were also cut to size. Placement of the moldings need to be considered, since they fit behind the panels, you have to determine when the molding needs to go on in relation to the panel already up and the next one to go up. Once all of the pieces of the puzzle were cut and their fit confirmed, it was time to attach them to the wall. There are a few options to glue the FRP panels to the walls, and we chose the Liquid Nails specifically for these panels.

DSC04304aThe Liquid Nails adhesive was removed from the can and smeared on the plywood with a putty knife and then spread out over the area with a notched trowel like those used to apply adhesive for ceramic wall tile. The notches apply just the right amount of adhesive as long as the entire surface is covered, being careful to not leave any bare spots. The adhesive requires that the material be set into it within 45 minutes or before the adhesive begins to skin over. With this in mind, we did each of the three sections, one at a time. In addition to the adhesive, all corners were thoroughly caulked with 3M 4200 to insure water would not leak into the corners. With good coverage with the adhesive and the panels in place, it DSC04305awas necessary to place braces made from 1”x 2” strips between the panels and the opposite wall, to hold the panels tight into the adhesive until it had time to dry. This was due to the rigidity of the panels and the tendency to pull away where the walls or panels were bowed.

DSC04338a
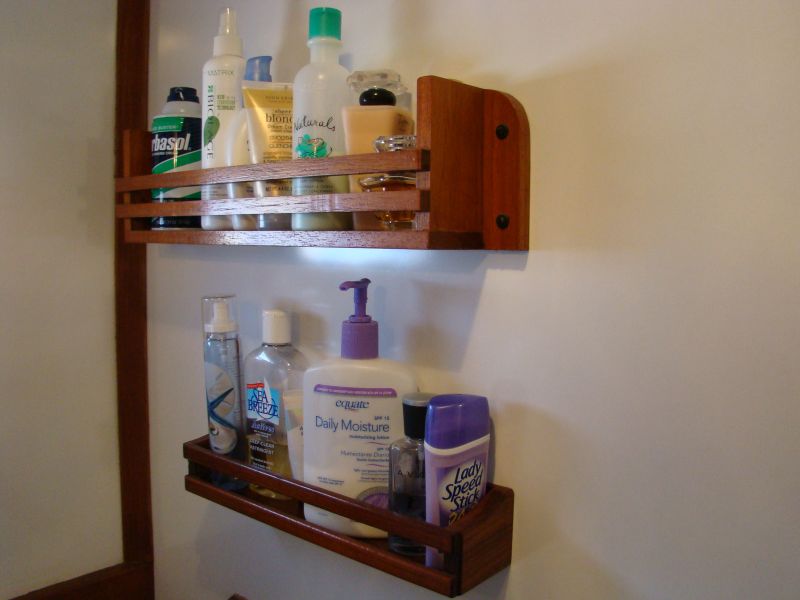
With all of the panels in place, the shower was beginning to take shape. The bottom edges where the panels meet the shower pan would need to be sealed completely. This is usually the area that will leak first if that were going to happen. For this, we used a vinyl strip that could be folded and would cover both the bottom of the panel and the lip around the pan. The corners have also been caulked thoroughly with 3M 4200 to seal everything and keep it that way. Next, the moldings where the panels meet the ceiling had to be installed. With the corner moldings in place and allowed to dry thoroughly for a day or two, we could begin the process of reinstalling everything back in place for the towels and various sundry items we use in the shower. Instead of just reinstalling everything back where it was, we planned where everything would go to keep the things that needed to stay dry in certain areas and also placing anything that would protrude from the walls in areas that would not cut down on space when we shower.
 
DSC04339aAll items attached to walls where sealed with caulking so that even the screw holes could not leak. We added a shower curtain slide system on the ceiling that would allow the shower curtain to slide easily but would keep it close to the walls. This gave us maximum space with the shower curtain in place and left a feeling of openness to the shower. Towel rings, teak racks, the mirror and a shower caddy for soap, shampoo, wash cloths, etc. all went in strategic locations. Everything worked out just as we planned and the shower turned out to be all we had hoped for. While we had the sink removed, we used to opportunity to paint areas that were hard to get to, like the inside of the hull behind the DSC04308asink. We also painted the area under the head where the new thru-hull had been installed before we launched. Once the project was completed and we had our first shower of the season on board, we were very pleased with our modifications. And the entire shower proved to be very water tight as we had hoped. Now for the next project.